

Custom Abrasive Sponge for Flawless Finishing on Any Surface
2026-10-10
Achieving a flawless finish on every surface isn't about using more force—it's about using the right tool. Enter the custom abrasive sponge, designed to adapt to your specific sanding needs. From contoured woodwork to delicate metal edges, a tailored sponge delivers consistent results where standard abrasives fall short. At SHENZHEN SUN ABRASIVES, we believe true precision starts with customization. Ready to see how the right sponge can transform your finishing process? Let's dive in.
Why Off-the-Shelf Abrasive Foam Peaks Too Early on Soft Substrates
Most stock abrasive foams are formulated around a narrow range of counter-pressure assumptions—typically the rigid, unyielding response of metals or hard coatings. When the same foam meets a soft substrate, the expected elastic rebound disappears. Instead of the abrasive grains being held at a consistent cutting height, the foam compresses unevenly, letting individual grains sink into the substrate surface. This immediate loss of grain protrusion means the foam's removal rate spikes in the first few seconds of contact, then collapses as the working face becomes clogged with smeared substrate material and dislodged grains.
The viscoelastic nature of soft substrates also plays a key role. Rather than providing a stable reaction force, the substrate absorbs and dissipates the energy of each grain impact. This prevents the controlled micro-fracturing that keeps sharp edges exposed on conventional abrasive systems. Instead, grains wear flat without fracturing, a condition often called glazing. The foam's open-cell structure, which normally aids swarf clearance, now works against it by trapping softened substrate particles deep in the pores. That trapped debris further reduces effective grain exposure, accelerating the drop-off after the initial peak.
Another overlooked factor is the mismatch in thermal conductivity and heat build-up. Off-the-shelf foams rely on the substrate to carry away frictional heat. Soft substrates, especially polymers or coated wood, insulate rather than conduct. Localized heat softens both the foam binder and the substrate surface, causing the foam to adhere momentarily and then tear away grains prematurely. This cyclic stick-slip action produces a jagged performance curve with an early, unsustainable peak, unlike the steady-state cutting seen on harder backings.
Matching Sponge Flex to Surface Curvature Without Losing Cut
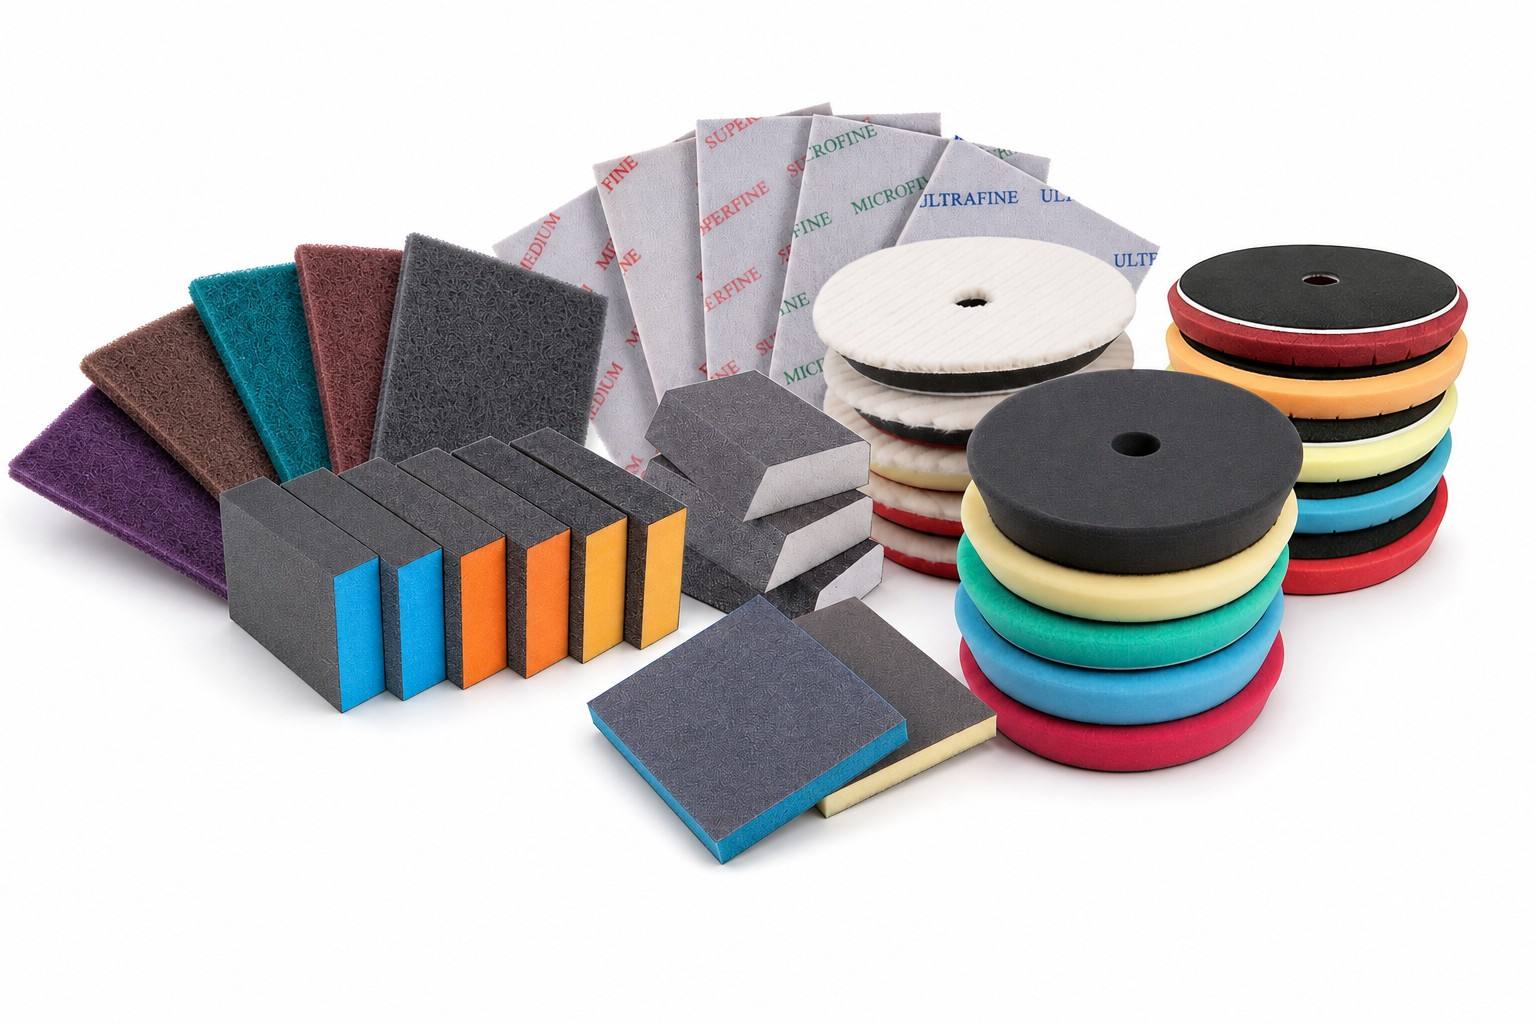
The real trick isn't forcing the sponge to bend—it's letting the blade follow the surface while the sponge keeps its memory of the cut line. Start by reading the curvature with your fingertips, not your eyes. A gradual crown on a car door or a tight radius on a furniture edge demands a different relationship between blade angle and sponge compression. Let the flex section work as a gap-filler, not a pivot point. When you tilt the handle slightly past parallel to the surface, the sponge's low-density zone compresses unevenly, which lets the cutting edge stay in contact without the corner digging in. That uneven compression is what preserves the original cut path while the tool conforms to the shape.
Many people over-compress the sponge, thinking more pressure means better conformity. That's backwards. A firm press flattens the sponge so much that the blade loses its clearance and starts scraping. Instead, use just enough pressure to close the visual gap between the sponge edge and the surface—nothing more. Watch the foam's rebound rate. If it springs back instantly when you lift, you're working with too much load. You want a slow, controlled return that matches the curvature transition. On convex surfaces, keep the sponge slightly ahead of the blade; on concave sections, let the blade lead and let the sponge trail lightly. This shift in lead-lag relationship changes where the flex energy goes.
The cut line stays intact only when the blade's lateral movement is continuous and the sponge's contact patch stays tangent to the local slope. A common failure is pausing mid-curve to adjust grip. That pause creates a micro-notch because the blade momentarily pivots on a compressed sponge corner. Instead, roll your wrist through the curve as one motion, allowing the sponge's flex to absorb the changing radius. If you feel the handle trying to twist in your palm, relax your index finger and let the tool find its own tangent. On tight compound curves, switch to a shorter stroke and slightly increase blade exposure—the reduced sponge contact area will flex more responsively without losing the original cut reference.
Open-Cell vs. Closed-Cell: Choosing the Right Structure for Wet Sanding
Wet sanding throws a curveball at conventional sponge thinking because water has to keep moving. Open-cell pads let the slurry drain through instead of pooling on the surface, which means the abrasive keeps cutting rather than hydroplaning over a film of grit. You'll feel the difference immediately on clear coats or gelcoat: less loading, fewer pigtails, and you can rinse the pad mid-panel without losing your rhythm.
Closed-cell foam, by contrast, traps water between the pad and the paint. That sounds like a drawback, but it also creates a more consistent cushion of pressure across the face, which some painters prefer when chasing the final few microns of orange peel on a flat hood. The trade-off is that you'll be stopping to squeegee or rinse the surface more often, and the trapped slurry can start to etch if you let it dry in place.
The real deciding factor is what you're sanding and how aggressively. For deep cutting on curved or vertical surfaces, open-cell's self-cleaning action saves time. For final finishing on broad, flat panels where control matters more than speed, closed-cell gives you a firmer, more predictable contact patch. Most pros keep both on the cart and switch based on the panel, not the product label.
Custom Grit Loading for Heat-Sensitive Plastics and Composites
Loading abrasive media into heat-sensitive plastics and composites demands a shift away from aggressive stock removal. These materials soften, warp, or degrade when surface temperatures climb, so the grit distribution has to work with the material's limits rather than against them. A carefully tuned loading pattern—one that balances cutting action with cooling intervals—prevents localized hot spots that ruin part geometry or cause resin burn. The goal is to maintain a steady, low-friction contact zone where each abrasive particle does its job without transferring excessive heat into the workpiece.
Instead of a uniform, dense grit pack, a staggered or clustered loading allows debris to clear and air to circulate between contact points. This reduces frictional drag and gives the plastic time to dissipate heat between abrasive strikes. For composites, the resin matrix is often the weak link; too much grit in one area can tear fibers or expose them to thermal stress. Varying the grit concentration across the tool surface—denser where controlled abrasion is needed, lighter near edges or thin sections—creates a more forgiving process that preserves dimensional stability.
Practical tuning involves matching grit size, spacing, and bond hardness to the specific polymer or composite blend. A softer bond lets dull grains release before they smear material, while wider spacing prevents heat buildup from overlapping scratch patterns. Operators who monitor surface temperature and adjust loading on the fly often outperform those relying on fixed recipes. The result is a cleaner finish, fewer rejected parts, and a process that respects the thermal sensitivity of advanced plastics without sacrificing throughput.
Hand Pressure, Water Feed, and the Path to a Haze-Free Clear Coat
Most haze in a clear coat doesn't come from the polish itself. It comes from uneven hand pressure during the final passes. When you lean harder on one edge of the pad, the abrasive cuts deeper on that side and leaves a faint cloud that only shows under direct light. Keeping your palm flat and letting the machine do the work sounds obvious, but it means constantly checking that your fingers aren't curling over the backing plate and adding pressure where you can't feel it.
Water feed changes how the clear coat responds to that pressure. A thin, steady mist keeps the surface cool enough to prevent the resin from softening and smearing, which is a common source of haze that appears after the panel dries. If the water stops for a few seconds, the pad grabs and the temperature spikes. That dry spot will polish differently than the rest of the panel, and you'll see it later as a patch of low gloss.
The fix is to treat both as one motion. Slow down the arm speed, watch the water sheen across the panel, and ease off the pressure as the defects start to fade. A final pass with very light hand pressure and a slightly increased water feed often clears the last of the haze without adding more cut. If the cloud comes back after wiping, the problem is rarely the product. It's usually a pressure spike that happened two passes before you noticed it.
Reading Sponge Breakdown to Stop Micro-Scratches Before They Spread
Most micro-scratches on coated lenses or polished surfaces don't come from the cloth alone. They start when a tiny piece of grit gets trapped in the sponge and then dragged across the surface under pressure. Once that first scratch line appears, it weakens the coating, making it easier for neighboring flaws to spread outward. By the time you notice the haze, the damage is usually already wider than the original mark.
Reading Sponge takes a different route. Instead of holding onto those abrasive particles, its structure is designed to break down in a controlled way as you wipe. The outer layers shear off into soft, damp crumbs that lift grit away from the contact point rather than grinding it in. That crumbling might look like the sponge is wearing out fast, but it's actually doing its job: sacrificing its own surface to keep the lens or finish untouched. The result is that micro-scratches never get the chance to spread from a single nick into a visible web.
FAQ
The main difference comes down to how the abrasive is bonded to a flexible foam core. A custom sponge lets you control the foam density, grain type, and coating pattern all at once. Instead of fighting a rigid sheet that skips over curves, the sponge compresses into contours while the abrasive stays in contact. You can also order a mix of grits on opposite sides, which no off-the-shelf pad offers.
Start by matching the scratch depth to the material's hardness. For soft woods or primer, something in the 180–240 range removes defects without gouging. On metals or hard clear coats, jump to 320–400 for leveling, then switch to a finer side for haze removal. The best approach is to request a test strip with two or three grit zones on one sponge, so you can feel the cut and finish before committing to a full batch.
Yes, but the key is the foam's rebound rate and the abrasive's friability. A softer, open-cell foam lets the grit sink just enough to follow the surface without burning through edges. For clear coat, pair a 500-grit aluminum oxide or ceramic grain with a low-density sponge. For veneer, stay above 600 grit and use a stearated coating to prevent clogging. You can even order the sponge pre-loaded with a lubricating compound for wet sanding.
Pretty much any profile that can be die-cut from a foam block. Common options include wedges, rounds, teardrops, and long blocks with radiused edges for moldings. Thickness ranges from 3mm for detail work to 25mm for aggressive material removal. You can also add a Velcro backing on one side or leave both sides abrasive. If you send a technical drawing, most manufacturers will cut a custom contour to match a specific profile.
Foam acts like a spring that evens out hand pressure, so you get fewer finger marks and edge digs. Paper backings are thin and transfer every ounce of force directly to the surface, while cloth is too floppy for precision. A medium-density sponge will hold its shape during long strokes, but compress enough to wrap around a 10mm radius without creasing. That balance is why auto body shops and furniture finishers favor custom sponges over folded sandpaper.
Most high-quality versions can be rinsed under warm water to clear out swarf and dried finish. The foam won't break down if you avoid harsh solvents like acetone or lacquer thinner. For water-based coatings, a quick squeeze in soapy water restores the cut almost like new. You'll get anywhere from 4 to 10 uses per side, depending on the grain type and how much pressure you apply. Ceramic grains last longer than aluminum oxide, especially on hard substrates.
Furniture makers use them between coats of lacquer to knock down dust nibs without cutting through the stain. Automotive restoration shops keep custom contour sponges for blending repair areas into original paint. Composite fabricators use them to prep mold seams and tight radii on carbon fiber parts. Even prosthetic and orthotic labs order small, firm sponges to smooth socket edges without changing the fit. The common thread is a need for consistent pressure on non-flat surfaces.
Conclusion
Off-the-shelf abrasive foam typically peaks too early on soft substrates, leaving uneven cuts and forcing you to swap pads mid-job. A custom sponge lets you tune the foam’s flex to match surface curvature without giving up bite, so gentle contours and sharp edges both get consistent abrasion. The choice between open-cell and closed-cell structures also shifts the wet-sanding behavior: open-cell holds water longer for cooler, cleaner passes, while closed-cell resists loading and stays firmer on flat panels. This level of control means you’re not adapting your technique to a generic product; the sponge is built around the substrate’s specific response.
For heat-sensitive plastics and composites, custom grit loading prevents the buildup that causes melting or discoloration, letting the abrasive do the work at lower pressure. Hand pressure and water feed then become part of the finish itself—too little water leads to haze, while steady, moderate pressure with a properly loaded sponge clears the coat without burn-through. Finally, learning to read the sponge’s breakdown, such as frothing, glazing, or uneven wear, tells you when to swap or adjust before micro-scratches spread. Instead of fighting the tool, you get a predictable path from coarse correction to a flawless, haze-free surface on any material.
Contact Us
Contact Person: Amanda Wang
Email: [email protected]
Tel/WhatsApp: +86-13602569854
Website: https://www.sunabrasives.com.cn