

OEM LED Headlight Bulbs: The Complete Upgrade Guide for Superior Night Driving
2026-07-18
Upgrading your vehicle's lighting isn't just about brighter beams—it's about transforming night driving into a safer, sharper experience. OEM LED headlight bulbs have redefined what's possible, but navigating the market to find a truly plug-and-play, durable solution can be overwhelming. Enter LUXFIGHTER, where precision engineering meets uncompromising performance. In this guide, you'll discover why not all LED bulbs are created equal, what to look for in a premium upgrade, and how to avoid common pitfalls—all while unleashing the full potential of your headlights without compromise.
Why OEM LEDs Make Halogens Look Like Candlelight
There’s a stark difference in how OEM LED headlights shape the road ahead compared to older halogen bulbs, and it goes far beyond just looking more modern. LEDs fire up instantly and generate a crisp, white beam that closely mimics natural daylight. Halogens, by contrast, struggle to push out a warm, yellowish glow that barely reaches the edges of the lane. The light output from an OEM LED isn’t just brighter in raw numbers – it’s precisely focused and spread evenly, eliminating the weak pools and harsh cutoffs that make driving with halogens feel like navigating by flickering candlelight.
The efficiency game is also completely different. A standard halogen relies on heating a fragile filament, wasting a huge chunk of energy as heat rather than usable light. OEM LEDs sip power and convert most of it directly into illumination, so engineers can design slimmer housings with complex reflector shapes that put every lumen exactly where it’s needed. This tight control means less glare for oncoming traffic and a sharper, farther-reaching view for you. It’s not just about seeing better – it’s about losing that constant sense of strain as your eyes try to decipher dim shapes on dark roads.
Then there’s the color temperature shift. Halogens top out around 3,200K, leaning heavily into amber tones that can blend into wet asphalt or fall foliage, hiding dangers in shadows. OEM LEDs typically run between 5,000K and 6,000K, a cool white range that heightens contrast and picks out obstacles sooner. After a night behind an LED setup, going back to a halogen system feels like someone dimmed the world. The difference isn’t subtle – it’s the jump from reading by a wax candle to working under a clear, powerful lamp.
The Real Reason Yellowish Beams Are a Nighttime Liability
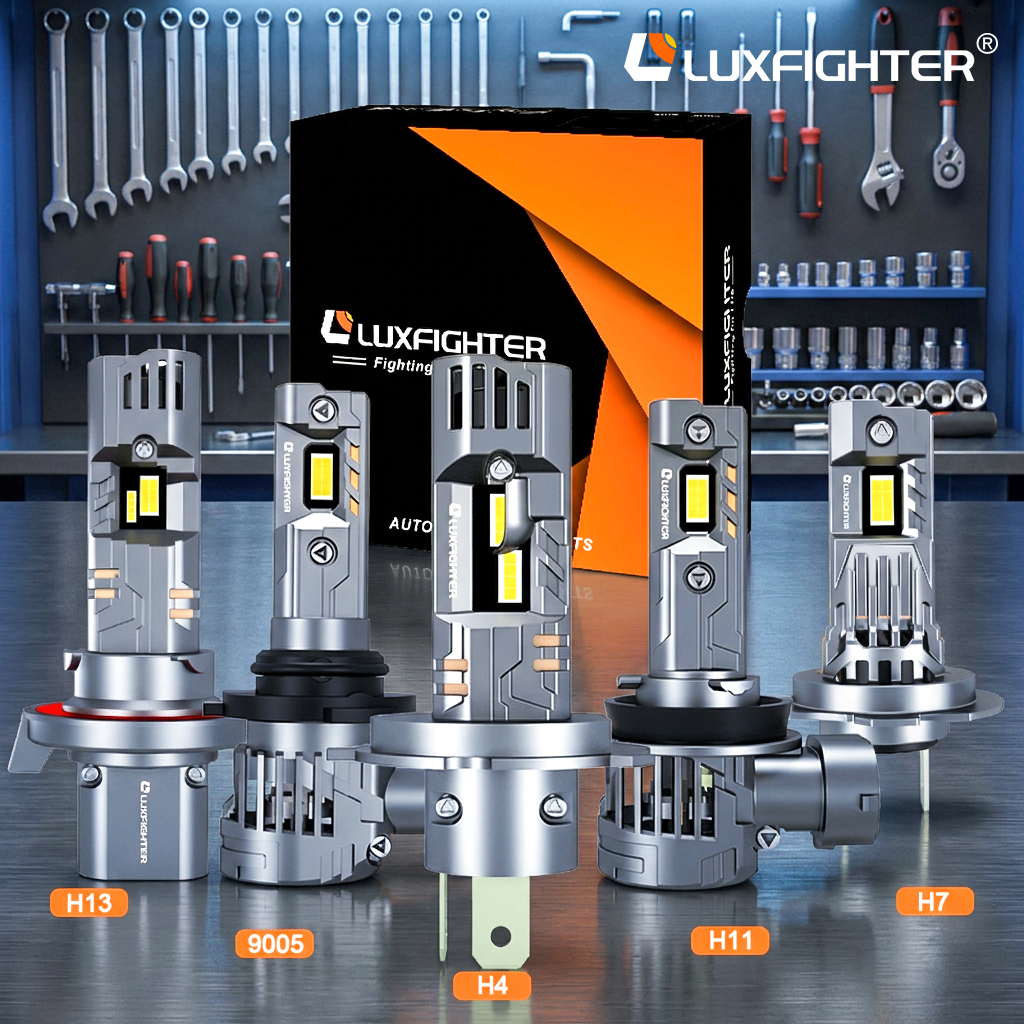
Yellowish headlight beams, often produced by older halogen bulbs, scatter more light in fog, rain, or snow than modern white or blue-tinted alternatives. This scattering creates a veil of glare right in front of your eyes, actually reducing how far you can see ahead. Instead of illuminating obstacles, the yellowish light reflects off moisture droplets, straining your eyes and slowing reaction times when it matters most.
Our eyes are naturally tuned to process blue-rich white light better in low-light conditions, which is why many drivers feel sharper and more alert behind the wheel with modern LED or HID headlights. The yellowish glow not only fails to cut through bad weather effectively but also blends too easily with street lighting, making pedestrians, animals, and road debris harder to spot in time.
Upgrading to whiter beams isn’t just about style—it’s a meaningful safety improvement. Crisp, white light improves contrast and depth perception at night, helping you react to hazards earlier. Many drivers are surprised by the immediate drop in fatigue during long night drives once they switch away from outdated yellowish bulbs.
Cutting Through the Lumens Hype: What Actually Matters After Dark
Lumens have become the go-to number for comparing lights, but chasing the highest figure often leads to disappointment. A pocket-sized torch blasting 3000 lumens might sound impressive, yet all that raw output means nothing if it creates a blinding wall of glare or scatters light everywhere except where you need it. The marketing obsession with lumen counts glosses over a simple truth: our eyes don't perceive brightness in a linear way, and how light is shaped matters far more than the sheer volume of photons being thrown around.
After the sun goes down, what you actually need is controlled illumination that works with your vision, not against it. Beam pattern is paramount—a well-designed reflector or optic can make 500 lumens feel more useful than 5000 poorly focused ones. Color temperature plays a huge role too; overly cool, blue-heavy light might seem brighter on a spec sheet, but it wrecks depth perception and increases eye strain over time. Then there's color rendering, which determines whether you can tell a tree root from a sleeping raccoon. A light with high CRI values reveals texture and subtle details that a lumen monster washes out into a flat, harsh glare.
Real-world scenarios demand thoughtful trade-offs rather than a one-size-fits-all brightness race. For walking a trail at night, a broad, even flood with a warm tint keeps you oriented without blinding you to the stars above. In contrast, searching for a lost dog across a field might call for a tight, long-range beam that punches through the dark without lighting up every particle of mist in the air. Ultimately, the best after-dark companion is the one that adapts to your specific needs—with intuitive controls, a comfortable beam profile, and just enough light to work with your dark-adapted eyes, not against them.
Your DIY Path to a Flicker-Free, Crystal-Clear Beam Pattern
Achieving a crisp beam pattern without flickering starts with a solid understanding of your vehicle's electrical system. Many factory setups introduce pulse-width modulation that can cause LEDs to flutter, so hardwiring a relay harness directly to the battery often provides the steady voltage needed. Pair this with a high-quality anti-flicker module, and you'll immediately notice how the light output stabilizes, giving you that sharp cutoff you're after.
The housing and projector lens are just as critical as the electronics. Even the best bulb can't fix a clouded or poorly designed reflector. Consider retrofitting a clear projector lens that matches your bulb's focal point, and take the time to adjust the beam height precisely. When everything aligns, you'll see a clean wall of light with no stray scatter, illuminating the road without blinding oncoming traffic.
Don't overlook the subtle details like bulb orientation and sealing. Rotating the bulb to the correct horizontal angle ensures the beam fills the road evenly, while moisture-proofing connectors and housing seals keeps the optics clear for years. A little extra effort here prevents the gradual degradation that leads to flicker or foggy lenses, turning your DIY project into a long-term upgrade you'll appreciate every night.
The Installation Mistakes Even Seasoned Gearheads Make with LEDs
Even guys who can rebuild an engine blindfolded sometimes forget that LEDs are diodes—current only flows one way. Reversing polarity won't just keep them dark, it can fry the junction in milliseconds, especially with higher voltage setups.
Another common slip is skipping the current-limiting resistor or grabbing whatever's in the junk drawer. LEDs aren't like old incandescent bulbs; without proper current control, they'll burn bright for a second and then never again. Always calculate the resistor value or use a driver matched to the LED's specs.
And don't overlook heat management. High-output LEDs generate surprising heat at the base. Bolting them to a metal housing isn't enough—use thermal paste and keep wiring away from hot surfaces, or you'll chase intermittent failures for days.
From Good to Great: Fine-Tuning Your Setup for Unshakeable Night Vision
Achieving consistent, high-quality night vision demands more than just a solid initial setup. It requires a meticulous fine-tuning process where you adjust every variable to its optimal state. Start by recalibrating your camera’s gain and exposure settings in real-world darkness, not just simulated environments. Small, incremental tweaks—like lowering the gain by 5% while slightly extending the exposure time—can dramatically reduce noise without sacrificing image clarity. The goal is to find that perfect balance where scenes appear naturally lit, even when the naked eye sees nothing.
Your lighting accessories play a pivotal role in this evolution. Rather than relying on a single, overpowered illuminator, incorporate adjustable diffusers and angled brackets to control spill and shadows. Experiment with infrared wavelengths—850nm for covert observation, 940nm for zero visible glow—and map out your typical surveillance zones to place illuminators where they complement, not overpower, the ambient conditions. A well-tuned auxiliary system should feel invisible in its operation, quietly enhancing detail without creating hotspots or glare.
Finally, treat your night vision setup as a dynamic toolkit that evolves with each use. Keep a log of environmental conditions—moon phase, humidity, artificial light interference—and the corresponding settings that worked best. Over time, you’ll develop an instinctive feel for the gear, enabling you to make quick, confident adjustments in the field. This hands-on familiarity transforms a capable rig into an unshakeable extension of your senses, ready to deliver flawless performance in any nocturnal scenario.
FAQ
OEM LED bulbs are designed to match the exact specifications of your vehicle’s original lighting system, ensuring proper fit, beam pattern, and compatibility. Unlike generic aftermarket bulbs, they often integrate seamlessly with existing housings and electronics, reducing the risk of flickering, error codes, or poor light distribution.
LED bulbs offer significantly brighter, whiter light that closely mimics daylight, which can reduce eye fatigue and improve reaction time while driving at night. They also last far longer than halogen bulbs and consume less power, putting less strain on your vehicle’s electrical system.
Generally, no—if you choose high-quality OEM-style LED bulbs designed for your specific model, they should work within the factory electrical parameters. However, it’s wise to check your owner’s manual or consult your dealer, as some manufacturers may have restrictions on aftermarket lighting modifications.
On most vehicles, it’s a straightforward plug-and-play job that takes 15–30 minutes. You typically access the bulb from behind the headlight housing, twist out the old halogen, and pop in the LED. Some tight engine bays might require removing a few components, but no special tools are usually needed.
Absolutely. Quality LED bulbs produce a more focused beam with less scattered light, illuminating road signs, obstacles, and lane markings farther ahead. Many drivers report feeling safer and more confident on dark rural roads or in heavy rain after upgrading.
First, confirm your bulb size (e.g., H11, 9005) in the manual or online. Then check the lumens and color temperature—around 6,000K gives a crisp white light without being too blue. Also, look for built-in CANbus error cancellers, effective heat sinks or fans, and a compact design that fits behind dust caps.
Yes, high-quality LEDs with precisely aligned chips can work well in projector housings, maintaining a sharp cutoff. This minimizes glare for oncoming traffic. Avoid cheap bulbs with poorly matched light sources, as they can scatter light and create dangerous glare.
Legality varies by region. In many places, retrofitting LED bulbs into halogen housings isn’t strictly road-legal unless the entire headlamp assembly is approved for LED. However, many aftermarket bulbs are designed to emulate the correct beam pattern, and enforcement is often lax. Always check local regulations to avoid fines or failed inspections.
Conclusion
Swapping out tired halogens for OEM-grade LED bulbs isn't just about chasing brighter light—it's about seeing the road the way engineers intended, without the murky yellow glow that fatigues your eyes and hides debris beyond the reach of your low beams. I remember the first time I drove a twisty backroad after making the switch; the crisp white cutoff painted a sharp line on the asphalt, and suddenly every pothole, every patch of gravel stood out like it was noon. That's because conventional halogen bulbs operate at a color temperature that skews heavily toward the amber end of the spectrum, robbing your depth perception and making obstacles blend into the background. The marketing guys will try to dazzle you with absurd lumen numbers, but after dark, what truly matters isn't a raw output figure on a spec sheet—it's the usable lux on the road, the beam pattern's uniformity, and the absence of glare that scatters into oncoming drivers' eyes. Forget the numbers race; focus on how the light is shaped and where it lands.
Getting that perfect beam isn't as simple as twisting a bulb into the housing and calling it a day, though. Too many well-meaning wrenchers overlook the clocking of the LED chips, ending up with a scattered, flickering mess that's worse than the stock setup. The key is dialing in the rotational alignment so the diodes sit at 3 and 9 o'clock, mirroring the filament placement of a halogen to maintain the reflector's designed focus. From there, it's the small tweaks—ensuring the ballast is securely mounted away from heat sinks, checking the anti-flicker module's compatibility with your vehicle's CANbus, and adjusting the headlight aim after installation—that elevate a decent upgrade into a revelation. Once you spend twenty minutes on a dark alley fine-tuning the vertical and horizontal adjusters, that's when the magic happens: a broad, even pool of light that extends further down the shoulder without a hint of scatter, turning nighttime driving from a white-knuckle chore into the kind of calm, confident cruise you didn't think was possible with factory optics.
Contact Us
Contact Person: Gavin Chen
Email: [email protected]
Tel/WhatsApp: (+86)756-6831079
Website: https://www.luxfighter.com/