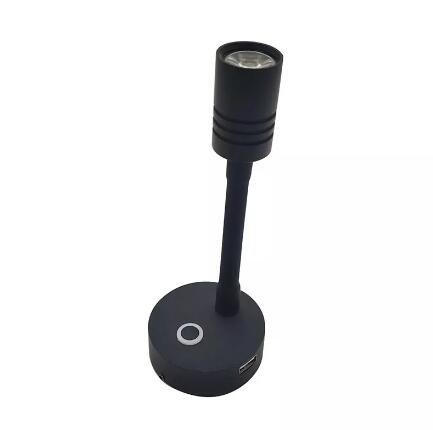
How to Install and Make the Most of Your Caravan LED Flexible Touch Dimming Light
2024-08-06
Introduction
Installing and optimizing the use of your Caravan LED flexible touch dimming light can greatly enhance your mobile living experience. This blog provides a step-by-step guide on how to install these lights and offers tips on how to make the most of their features for a more comfortable and efficient lighting setup in your caravan.
Step-by-Step Installation Guide
1. Gather Your Tools and Materials:
- Caravan LED flexible touch dimming light
- Screwdriver
- Screws and anchors (if needed)
- Drill (if required)
- Wire connectors (if connecting to existing wiring)
2. Choose the Installation Location:
- Select a spot that provides optimal lighting for your needs, such as near a reading area, workbench, or kitchen counter.
- Ensure the location is accessible and free from obstructions.
3. Prepare the Mounting Surface:
- Clean the surface where the light will be installed to ensure proper adhesion or anchoring.
- If drilling is required, mark the drill points using the mounting base as a template.
4. Mount the Light:
- Attach the light to the chosen surface using screws or adhesive strips, following the manufacturer's instructions.
- If using screws, drill pilot holes if necessary and secure the light with screws and anchors.
5. Connect the Wiring:
- If your light requires a wired connection, ensure the power is turned off before connecting the wires.
- Connect the wires from the light to the existing wiring in your caravan using wire connectors. Match the wire colors according to the manufacturer’s guidelines.
- Secure the connections with electrical tape and ensure they are properly insulated.
6. Test the Light:
- Turn on the power and test the light to ensure it is functioning correctly.
- Adjust the light’s position using the flexible arm and test the touch dimming feature to ensure smooth operation.
Tips for Making the Most of Your Caravan LED Flexible Touch Dimming Light
1. Optimize Lighting Angles:
- Use the flexible arm to direct light precisely where you need it. Adjust the angle for reading, cooking, or general illumination to avoid shadows and maximize comfort.
2. Utilize Dimming Features:
- Experiment with different brightness levels using the touch dimming feature. Create a bright environment for tasks that require focus and a dim, cozy ambiance for relaxation.
3. Energy Management:
- Take advantage of the energy-efficient LED technology to conserve power. Use dimmed settings during the day to save energy and extend battery life.
4. Multi-Functional Use:
- Install multiple lights in different areas of your caravan to serve various purposes. Use them as reading lights, task lights, ambient lights, or night lights, depending on your needs.
5. Maintenance and Care:
- Keep the light clean and free from dust to maintain optimal performance. Gently wipe the surface with a soft, damp cloth as needed.
- Regularly check the connections and mounting to ensure the light remains secure and functions properly.
Enhancing Your Caravan Experience
1. Create Zones:
- Use the lights to create different zones within your caravan. For example, set up a reading nook with a dedicated light or illuminate the kitchen area for cooking.
2. Enhance Aesthetics:
- Position the lights strategically to highlight decorative elements or features in your caravan, enhancing its overall look and feel.
3. Safety and Convenience:
- Install lights in areas that require frequent access during the night, such as near doors or along pathways, to ensure safety and convenience.
Conclusion
Installing and effectively using a Caravan LED flexible touch dimming light can significantly improve your caravan’s lighting setup. By following the installation guide and making the most of its features, you can create a comfortable, efficient, and aesthetically pleasing environment inside your mobile home. Whether you’re reading, cooking, or simply relaxing, these versatile lights offer the perfect solution for all your lighting needs.


